Double car garage and shop domes.
Our House Construction - Exterior Shell
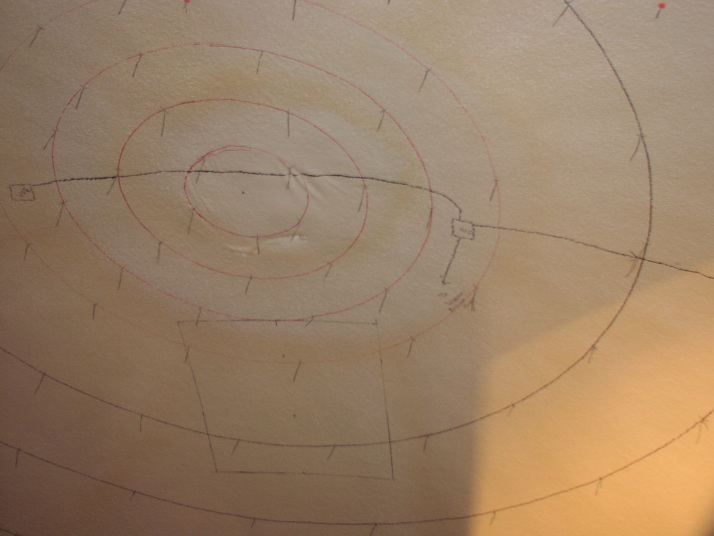
The equipment has arrived!

First we staked out the inside dome curvature so there is something to attach the dome airform to..
Next we attached plywood framing to the stakes to provide the anchor material for the airform.
We are building the two outside domes first and will join them in the middle later with the third dome.
Add an air lock (wooden box) so we can get in and out of the dome without deflating it. Park the scaffolding assembly to the center of the dome so it will be available after the dome is inflated (Can't get it through the door once the dome is up!)
Second Day 6/10/03
Time to unfold the home made Airforms we have had stored away for a few months now. Wonder if they will work? Did we screw something up when we made them? We will find out when we inflate them!!
Wow - its starting to fill up with air and it looks OK. Wow!
The wind had to play with us a little but finally its inflated!
Inside - the air lock is in place and a view of the interior air form.
Air tube and our anchoring of the air form so it doesn't take off like a rocket (OK maybe a balloon when you let it go).
The second airform has been anchored to the footing and attached to the first so it is receiving air and inflates.
Two views of the garage and shop domes inflated.
This is the view from the road. Fun to see the cars slow down when they see the domes for the first time. Wait until all seven domes are up!
We are excited!!
What a wonderful way to end a fantastic day! God's paint brush across the sky.
Light them up! Gee wonder what they look like from across the valley or from the air?
First Day 6/9/03
Third Day 6/11/03
Today we add the insulating layer to the dome interior surface.

Here Mark is spraying it on.
Partially coated - cool looking!

Picture on the right illustrates the first coat of many to complete the dome insulation layer. This also adds rigidity to the dome structure. Hope so - we have some good winds whipping up at times!
Fourth Day 6/12/03
Yesterday we did finish spraying the first dome and today we completed the second dome. So they are both self supporting and we can turn off the blower.
As luck would have it rain came and then hail. Check out the hail pile between the domes.
Our domes are now pockmarked but still standing! The dents won't hurt anything and will be taken care of with the exterior seal coating.
One big advantage of a dome is that everything takes place inside! Rain, snow or even hail won't stop us from working.

All the openings must be well marked so we know what to remove and what not too.
Left picture is the eventual opening to the patio
Right picture is of the left side of the garage door opening and the interior floor height mark.
Fifth Day 6/12/03
The time consuming thing is the layout of everything! Everything must be indicated in order to get it right. Its a little tough (with concrete) to make corrections once it has set up.

Here the floor level is marked on the wall at the garage door. We need to now that so we can put in the torsion ring under the door opening (we don't want to drive over a hump as we enter the garage)!
The foam insulation must be stripped from the footing so the concrete will adhere to the previously poured footings.
Here the window is marked out for the shop as well as the electrical routing. Both boxes and conduit is indicated.
The shop will have a skylight in it as indicated by these markings. It requires electrical so we can open it plus the electrical delivery for lighting in the shop is marked out also.

Wow things are moving! The first week is finished!
House Shell
Reminder: Click on any picture to make it larger!
Visit MountainView
Message Board
Construction
Airforms
Footings
Black Hole
Creek Crossing
What is a dome?
House Design
Home page
Personal
Quick Links:
Return to Page 1
or Page -2
or page 3
or Page 4
or page5
or page 6
or Page 7
or Page 8
Return to Page 1
or Page -2
or page 3
or Page 4
or page5
or page 6
or Page 7
or Page 8